The current page has been visited 27577 times.
Visitors today: 4
Hits to all pages: 10627345
Server-Time: 09:01
2026-02-03
|
How to flash a PC FlashBIOS... :)
2000-08-06
Usually, when you want to update a PC BIOS, you will use a flash utility like AwardFlash (awdflash.exe).
This small program accesses directly the FlashROM which contains the computer's BIOS.
Some weeks ago, my brother wanted to upgrade his PC (an older PII-233) with a Celeron333 CPU.
Well, what can we expect by "compatible" computers: it didn't work... after a look at the
motherboard's vendors homepage we knew, that the BIOS was rather old and newer versions should support
the Celeron CPU, too.
After downloading the update and the flash-utility, the try to update the BIOS failed. The tool said,
that the 128kB update file was too small - no wonder: the computer had a 256kB FlashROM built in...
After contacting the support, they told us, that it should work; they sent us an other flash-tool
but this didn't work either...
Well... what to do now? Buy a newer board with those >500MHz CPUs noone really needs - and put the old
stuff into the trash? No. There must have been be an other solution: I would burn the Flash myself by hand! :)
 |
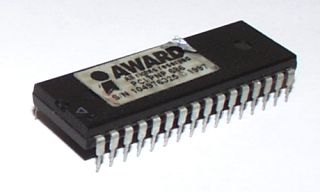
Here is a picture of the original FlashROM (an Atmel 29C020). I downloaded the datasheets for this
chip and decided not to program this chip because of its unusual programming algorithm. I also wanted
to have a true (working) backup.
|
My favourite FlashROMs are from AMD - they are really nice to handle because they have a smart programming algorithm.
And the biggest advantage: I already had some of those chips here... ;)
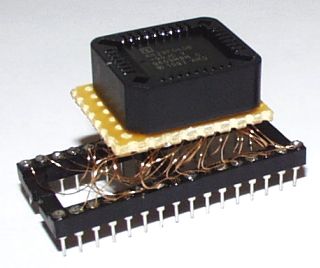
As I had only 29F040-chips in a PLCC-package, I had to solder a small adaptor to the 32Pin DIL-package of the
original FlashROM.
|
This picture shows the result of my work - a PLCC-socket with flying vero-wire wires soldered to a DIL-socket.
Well, not the nicest version (no PCB...), but for one single chip in my opinion the best solution.
|

|
Now you surely ask yourself: "how does he want to program the chip?". A good question - as I do not have a
professional programming device (they are rather expensive) I did it my own way.
I used a small and very very old Microcontroller (8052AH-BASIC) from intel (yes, intel-crap, I know...) which
provides a full BASIC-interpreter in its ROM. It is very slow but it provides enough IOs to connect a FlashROM
to it. As it only has 64kB address-space, I had to add some more address-lines by using some of its other IOs.
The programming software I programmed already some time ago and it really works nice.
The microcontroller-board was connected over a serial connection to my Amiga 3000 where I use Term4.8 to have
terminal-access. The data-upload was managed by my programming software on the microcontroller and a small
ARexx-script which feed Term with the data it had to send to the board.
 |
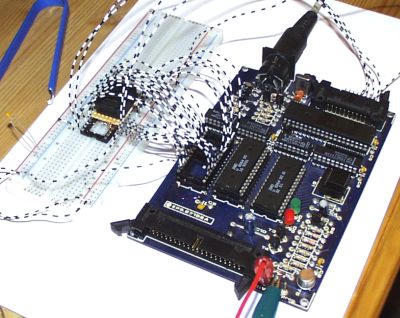
Here you can see the mentioned microcontroller board with the connected FlashROM. Looks crazy? - No thats normal! ;)
|
Perhaps you now want to know what data I programmed in the Flash - the file is 128kB and the chip 256kB...
Well... I joined the first 128kB of the old chip contents together with the BIOS update. This results
in a 256kB file - I didn't know if it would work, but it was worth a try... :)
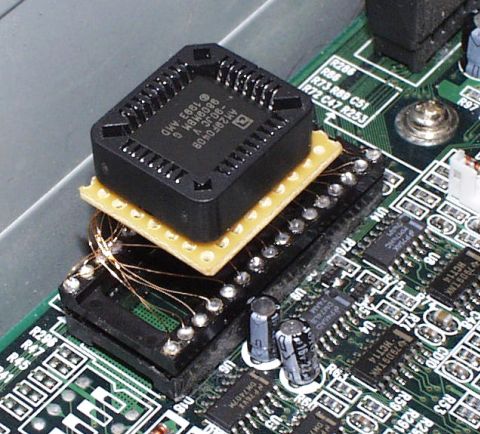
After programming the chip, I inserted the whole thing into my brother's PC.
It worked! :) - Now everything works and he can use his new Celeron-CPU...
Here is a picture how the whole thing looks like:

|
|


